But it's Perfectly Good!
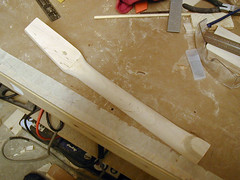
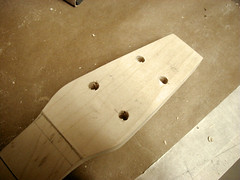
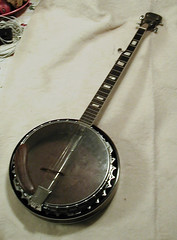
I scored an old Harmony Marquis banjo from Craig's List last Friday. Sight unseen I figured I could harvest the tailpiece, tension hoop, tension hooks, nuts, and (if it had them) hex or shoe bolts from the thing, hardware that would cost more to buy separately nowadays... and wind up with a spare neck, pot, and resonator as part of the deal.
Old brands like Harmony and Kay are the target of much scorn among banjo enthusiasts, and not without reason; they tended to be cheaply made, with pots made out of either bakelite or (as is the case with this Harmony) solid aluminum, and more often than not they'd be poorly set up... the end result being that aspiring banjo players would be frustrated away from the instrument.
Given that reputation, I was surprised how solid this banjo felt when I saw it... it looks like it's seen very little use over its 30ish+ year existence. There's some damage to the binding right near the 5th string peg and the fake mother of pearl inlays have yellowed a bit, but other than that the only wear I see are the sorts of nicks and scratches an instrument would pick up from kicking around the corner of somebody's living room without a case. There's even still a protective layer of paper on the truss rod cover, never removed.
Whoever strung the instrument last probably contributed a great deal to its non-use; strings were attached to the tailpiece in apparently random order, which means they're crossing the bridge at impossible angles and wanting to pull it out of position. The friction fifth string peg was loose, which would have been tremendously frustrating, and the other four strings were tuned way too low.
The yankee pragmatist in me observes all of this, and says, "Why, for the cost of a new set of strings and an hour or so of tinkering, you'd have a perfectly good knockabout resonator banjo!"
The only problem is, I really don't need a knockabout resonator banjo. I find myself concentrating on clawhammer playing these days, and one neglected resonator banjo is quite enough!
I also feel a little bit of guilt at the thought of dismantling this instrument, which seems like it never got a chance to make much music; with decent set-up, it could be an entirely servicable starter banjo for somebody... although I doubt I'd be able to get much more for it than what I paid, and it's certainly not worth spending the time or money to repair the binding and upgrade the tuning pegs. So, in the end I expect it will be coming apart as soon as I have a rim that needs hardware.
posted by A.N. Chase | 5:47 AM
|
1 comments
![]()