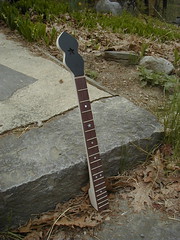
Tenor #1: Neck, Part XI
In the end I decided to take a bit more wood off the neck behind the first several frets. Not a lot, but enough to feel perceptibly more slim.
With that done, I decided to try installing the rest of the frets. The going definitely got easier the more I did, and after the 18th one I almost felt like I knew what I was doing.
There are still a few frets that are not completely flush with the fingerboard. Rather than attack them with a hammer and block of wood again, I think I will build a caul to fit over one of my vice's jaws and press them that way.
With the frets in place, I went ahead and routed the star-shaped slot in the peghead. I'm not sure how, but I managed to cut it noticably crooked. As a result I had to go back and cut a few of the points much larger than I would have liked so that I'll be able to glue the star in straight. Between the black cyanoacrylate I have to glue it in, the black dye I'm using on the peghead, and layer of gloss finish that will ultimately cover the whole thing it shouldn't be too noticable.


0 Comments:
Post a Comment
<< Home