Tenor #1: Neck, Part III
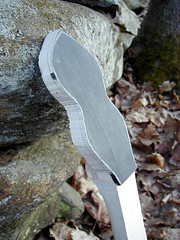
 I had done a fair amount of shaping on the neck since the last photo, and I decided it was time to shape the peghead before continuing.
Taking a tip from Siminoff's book, I positioned the veneer and then drilled two small pilot holes outside of the "live" peghead area; after gluing the peghead, two nails in the pilot holes kept it from shifting when I applied clamps.
My little 9" benchtop bandsaw does a surprisingly capable job during shaping; I used a jig to hold the peghead at its 15 degree angle to the blade, and because I went with a simple peghead shape the cutting went quickly and without incident. More and more I find myself using the running blade to scrape small amounts of wood away laterally to smooth rough spots... eventually I'll need to experiment with a finer blade.
I was also able to thin the overall peghead thickness much closer to the final target of 9/16ths of an inch. My hand-cut overlay is not very graceful.

0 Comments:
Post a Comment
<< Home