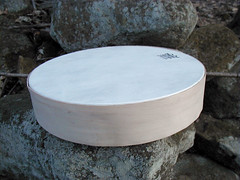
Tenor #1: Rim, Part III
 In the end I decided to use the full 2 inch width of veneer. In an attempt to avoid ironing directly against the edge of the drumhead, I first tried ironing the veneer agains a length of parchment paper. My theory was that the glue would melt without sticking, and I would be able to peel it up and apply it directly to the drum.
That might have worked if I had planned to apply the veneer in two lengths, but on my first try I went for the full 31.42 inch length. (Hey high school geometry slackers: π × the 10" diameter of the drum rounds up to 31.42 inches. Yes, you will use this stuff in real life.)
31 inches proved to be too long to manage with the parchment paper technique; the glue wouldn't have stayed hot long enough to iron the whole length at once, and there was no good way to apply it gradually. In the end I decided to iron directly against the outside of the drum, avoiding the staples and head material at the top 1/4 inch.
The only problem there was that the presence of the staples made the veneer want to go on in a very gradual spiral, since the surface wasn't perfectly flat. By the time I got halfway around the circumference of the drum, the edges were out of whack. I wound up cutting the veneer in half, so there will be two seams: one where the neck attaches, and one where the tailpiece attaches. Even so, the veneer didn't go on as smoothly as I would have liked. There are a few uneven spots where I'll have to go back and try and re-iron and smooth it down, but I don't know how well that will work.

0 Comments:
Post a Comment
<< Home